Showing posts with label FPGA. Show all posts

Thursday, May 10, 2012

FPGA hello world - Led blink - Part III

  Hello everybody!
 As promissed a century ago, in this post I'll show how to assign pins to our FPGA hello world, aka Led blink, how to generate our bitstream and how to program our FPGA. So let's do it!
  We have two choices:

  1) In menu Tools/PlanAhead - Pre-synthesis or
  2) In the design windows, in User Constraints, just double click in I/O Pin Planning (PlanAhead) - Pre-synthesis In both cases, it will ask you to create an UCF file. Accept it by clicking Yes.


  You'll note a new file helloworld.ucf, double clicking it will open PlanAhead. We can see all ports that we have declared before:
  led(8) - output
  clk - input
  updown - input

  Now it's time to assign pins to signals. In this board we have:

  Led 0 - R14
  Led 1 - C3
  Led 2 - E6
  Led 3 - D6
  Led 4 - D13
  Led 5 - A7
  Led 6 - G9
  Led 7 - A8
  clock - C9
  updown - L13 (switch SW0)

  Here we can see in PlanAhead all pins assigned.


  Note that we have again two options. Using PlanAhead we can click in the Site column and chose which pin to use or ISE, double click in Edit Constraints (Text) and type all constraints. Normally I assing one by PlanAhead and copy the rest in text mode which I think is faster.
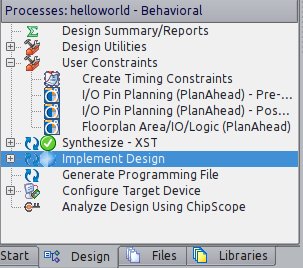
  Once done we can implement our design by clicking in Implement Design at Design tab in ISE.


  Now it's time to generate our programming file by clicking in Generate Programming File (durrr). Once done, we click in Configure Target Device which will opens Impact. It will ask you to create a new project file, just click Yes.
  Go to menu Edit/Launch Wizard. Select Configure devices using Boundary-Scan (JTAG) and select our helloworld.bit file. Bypass all 3 others devices. In the next window, check Pulse PROG, click in Apply and OK.


  In the image above we can see that our FPGA is assigned with helloworld.bit and the others 3 device were bypassed. Now right-click over the green FPGA and select Program.
  And it's done! (I really wish that your leds are blinking!!! LOL)
  
  Marcelo


Read more ►

FPGA hello world - Led blink - Part II

  Hello!
  In this post I'll show you how to simulate our hello world design.
  In ISE, in Design tab, select View Simulation as in the image below


  Now we "compile" our design as usual. First we select in Hierarchy our helloworld entity and click first in Behavioral Check Syntax and then Simulate Behavioral Model.


  After click in Simulate, a new program will be launch - ISim.We'll have all signals defined in our design there.

  We select all signals and we add them to wave window. We can drag and drop them or right clicking all selected signals and selection Add to wave window.
  We need to create our clock signal by right-clicking in clk signal and selecting Force Clock. In our case 50MHz has a 20ns period. We set our updown to 0 first and then to 1 to see what happens. Here I also changed blink_freq to 1000000 to be able to show you the results (1 Hz is an eternity for our FPGA). Click in run and that's it!


   We can see that we're decreasing our led value when updown = 0 and increasing when updown = 1. The updown value changes in the blue cursor.

  Next post, I'll show how to configurate our FPGA and finally see our leds blink!

 Bye
 Marcelo
Read more ►

Sunday, January 15, 2012

FPGA hello world - Led blink

  Hello guys!
  Let's do our first design using the demo board.

  I'll explain step-by-step how to create a new project, develop our code and synthesize it using ISE 13.3 installed in the last post.

  1) First we have to create a project.Go to File > New Project...
      Name: helloworld
      Top-level source type: HDL

  2) Then we have to select device
      Family: Spartan3E
      Device: XC3S1600E
      Package: FG320
      Speed: -4
      Simulator: Isim(VHDL/Verilog)
      Preferred Language: VHDL
      VHDL Source Analysis Standard: VHDL-200X

  3) Now at panel left "Design", right click over : xc3s1600e-4fg320 and select "New source..."
  4) Select "VHDL module" and type filename: helloworld.
  5) We don't need to enter right now the port name. We can define after in the code. Click NEXT and then FINISH.

  Now we can start make some code:

library IEEE;
use IEEE.STD_LOGIC_1164.ALL;

-- Uncomment the following library declaration if using
-- arithmetic functions with Signed or Unsigned values
use IEEE.NUMERIC_STD.ALL;

-- Uncomment the following library declaration if instantiating
-- any Xilinx primitives in this code.
--library UNISIM;
--use UNISIM.VComponents.all;

entity helloworld is
   port (clk : in STD_LOGIC := '0';
      led : out  STD_LOGIC_VECTOR (7 downto 0) := (others => '0');
      updown : in STD_LOGIC := '1'
      );
end helloworld;

architecture Behavioral of helloworld is
   constant CLK_FREQ : integer := 50000000;
   constant BLINK_FREQ : integer := 1;
   constant CNT_MAX : integer := CLK_FREQ/BLINK_FREQ/2-1;
   signal value : std_logic_vector (7 downto 0) := "00000000";
   signal cnt : unsigned (24 downto 0) := (others => '0');
begin

   process(clk)
  
   begin
      if rising_edge(clk) then
         if cnt = CNT_MAX then
            cnt <= (others =>'0');
            case updown is
               when '1' => value <= std_logic_vector(unsigned(value) + 1);
               when others => value <= std_logic_vector(unsigned(value) - 1);
            end case;
          
         else
            cnt <= cnt + 1;
         end if;
      end if;
   end process;
  
   led <= value;
  
end Behavioral;

This program is very simple. The leds will count in binary mode, upwards when updown is '1' and downwards when '0'.
At lines 1, 2 and 6, as like in C the #include statement. The STD_LOGIC_1164 define most of standard logic levels like high, low, Z, X, etc. The NUMERIC_STD is used to be able to use functions with signed and unsigned types.

We define our entity at line 13 and it has only 3 pins: clk, led and updown where clk and updown are input type and led an 8 bits output type.
As our circuit is a synchronized one, we will perform some action only in a rising edge of clock. It's done at line 28 with the reserved word rising_edge.
And finally, as our clock use a 50MHz crystal, we have to have a pre-scale counter to be able to see the leds changing, otherwise, we would see the 8 leds always on. We use for this purpose the signal cnt that counts from 0 until CNT_MAX.
Now, to synthesize our circuit, select View: Implementation and menu Process > Implement Top Module.


It will take a while because synthesize a circuit is very different of compiling a code. If you want to know more about, there are lots of sites out there that explains the difference. Just google it!
Next post I'll show you how to simulate our design, how to assign to the physical pins the signals that we defined in our code, how to generate the bitstream that will be programmed in the FPGA and finally how to program the FPGA demo board!

Marcelo
Read more ►

Saturday, October 1, 2011

Spartan 3E demo board

Hello people,
As I said, I'm studying FPGA/VHDL and for that I have a spartan 3E demo board from Digilent. It's a very nice demo board and it has everything that it takes to program the FPGA (no need of special cable).
I'm using ISE 13.1 web edition. It's free and I can do everything I want in this demo board with that version.
I'll stop studying embedded linux for while and focus in FPGA because I have to develop some projects in my current work! =D
Next posts I'll show you how we use ISE, how simulate, how program the FPGA and of course some examples of what I'm working.

Marcelo Jo
Read more ►

Friday, June 10, 2011

First Post!

  Hello folks!

  This is my very new post here. Before we start, let me present myself. My name is Marcelo I'm from Brazil but I live in Canada since 2007 (so, I'm sorry for my bad english lol). I'm an electronic engineer graduated at UTFPR in 2003 and I work with electronics since 2001.
  My experience is in 8/16 bits systems and that's why I'm creating this blog.... I'm moving to a 32 bits world with an OS. I would like study FPGA/VHDL and digital image processing too. So, this blog is not only about embedded linux.

  Before put hands on dirty, let me show some books that help me a lot to learn about those subjects:

Linux Embedded Primer
It's a very good book that explain in deep about how embedded linux works. As a beginner I enjoyed it a lot.
It covers linux boot, some boot loaders as u-boot, device driver development basis, kernel debugging technics, etc.
Actually my friend Sérgio Prado told me about this book!


Linux Device Drivers
It's also a very good book about linux device drivers. It explain in detail about types of device drivers, device driver development techniques, some debugging tools, timers, memory allocation, interrupt handling and of course how to write one. In the link above you can read online this book, so, if you don't want to buy a copy, you can read it first! I bought one because I think that it's a good idea have one copy for reference!


Linux Kernel Development
I have the second edition, but the third edition is already available. I didn't finish it, but I read some chapters. This book teaches about the linux kernel like process management, process scheduling, system calls, memory management, etc.
I think that it's a must have to full understand the kernel.


Circuit Design with VHDL
This book is a good book to learn VHDL. It covers from basic until intermediate level of VHDL. I read once but I have to read again. I thought a good book because it explain the language and after show a example. There is lots of example in the book.
But this book don't explain how to program and configurate a FPGA, it's intend to teach VHDL only. There is a small tutorial in appendix.
Professor Pedroni was my teacher at university, I did only one course with him and it was about FPGA.


FPGA Prototyping by VHDL Examples: Xilinx Spartan-3 Version
Since I have a dev board from Digilent with a Spartan 3, this book is perfect to apply all the knowledge acquired. This book is the hands on, all theorical stuff that we learned with Pedroni's book, we can apply now.
If you know already VHDL, this book is very good to learn how to put everything in practice in a FPGA.


Computer Vision
I didn't read this book yet, only firsts chapters. But this book is a good book for everyone that don't have any knowledge in computer vision, digital image processing, etc. But it's intend for people who has an engineering background, so, it's a little technical and it covers more computer vision than image processing techniques (as the title suggest derrrr)
It covers all the concepts to process an image, it explain concepts about the problems in computer vision systems, images representation, binary images analysis, pattern recognition, filters, image segmentation, image matching, etc.


Digital Image Processing
I didn't read this book either (no free time). This book is more about image processing and it's very technical. It teaches from the human eye until object recognition, so it might be very complete. I read several reviews at amazon and people are used to like this book.
Actually I have a friend who works in this field and he suggested me those two books! =D


That's all folks!!!

Marcelo Jo
Read more ►